Ariki · Clothing lane · For humans
We build Ariki's garments as real sewn cloth — flat pattern pieces, stitched along seams, dropped onto Lena's actual game body and simulated until they hang. Nothing is sculpted by hand. This page explains what we've made, how the process runs, and the things that took us a long time to learn.
Clothing runs on a two-stage lane. Marvelous Designer is the upstream half — it answers "what is this garment, and what shape is it on our body?" A headless Blender pipeline is the downstream half — it answers "how does the game wear it?" They meet at a garment mesh.
reference photo ──▶ [ MARVELOUS DESIGNER ]  ──▶  garment mesh (FBX/OBJ)
   or concept        draft · drape · texture       1.2k–4.7k verts, already fitted
                     measure · screenshot          + .zprj editable source
                                                            │
                                                            ▼
                                   [ clothing/garment_pipeline.py — headless Blender ]
                                    census · prepare · fit · reduce · skin · export
                                                            │
                                                            ▼
                                   ariki-game/assets/quaternius/outfits/<set>/
                                   per-slot GLB on the shared 65-bone skeleton
The upstream half needs a human to start each session. The downstream half is fully automatic.
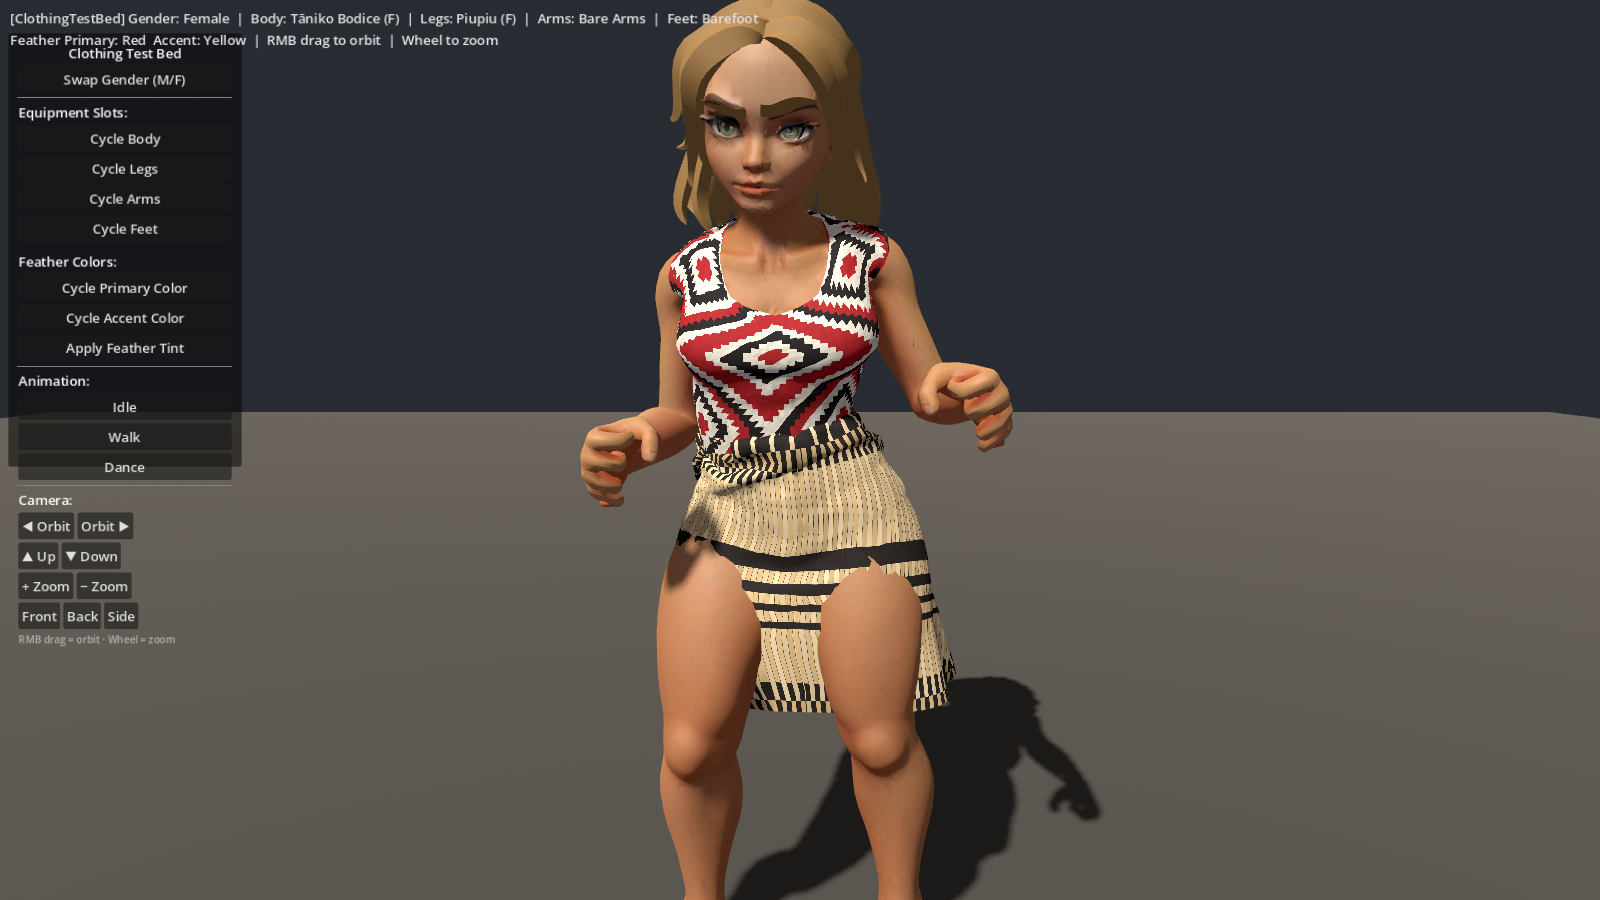
fit stage's clearance shell exists to prevent, and it is
why we review in the test bed rather than trusting the MD render.
Six steps. Every one of them produces numbers that the next one is checked against.
Before drafting anything, the reference image is deconstructed into a worksheet: which body slot each piece belongs to, where it's anchored, where its edges should sit in metres, and how much ease (slack) it needs. Every downstream number traces back to a row of that worksheet. Skipping this step is how early garments shipped 4–14 cm off target.
Lena is stylized. Her card reads roughly 108 – 67 – 109 cm with
72 cm thighs on a 178 cm frame. Real-world
size charts produce clothes that simply do not fit her. The measurements are extracted straight
off the game mesh by a script that slices it at known heights
(tools/tailor/measure_body.py), so they describe the body the game actually renders.
We have parametric blocks — a fitted top, an A-line skirt, a strand/fringe skirt — that turn worksheet numbers into a runnable pattern. You give it the band height, hem height and ease; it emits the panel outlines, the seam pairing and the arrangement rules with the known fixes already baked in. Hand-typing point lists is how the early mistakes happened.
The flat panels get arrangement points on the avatar (shoulders, waist, skirt front/back), then the cloth simulates onto her. The sequence matters more than the settings:
This is the step that was missing at the start, and it matters most. Early drapes were accepted because they looked like clothing. They were bunched around the middle.
Now every drape is measured. A script (qc_placement.py) reads the render, separates
background from skin from garment, calibrates pixels-to-metres off Lena's known 1.777 m height,
and reports where each garment band's top and bottom actually sit — against a target table pulled
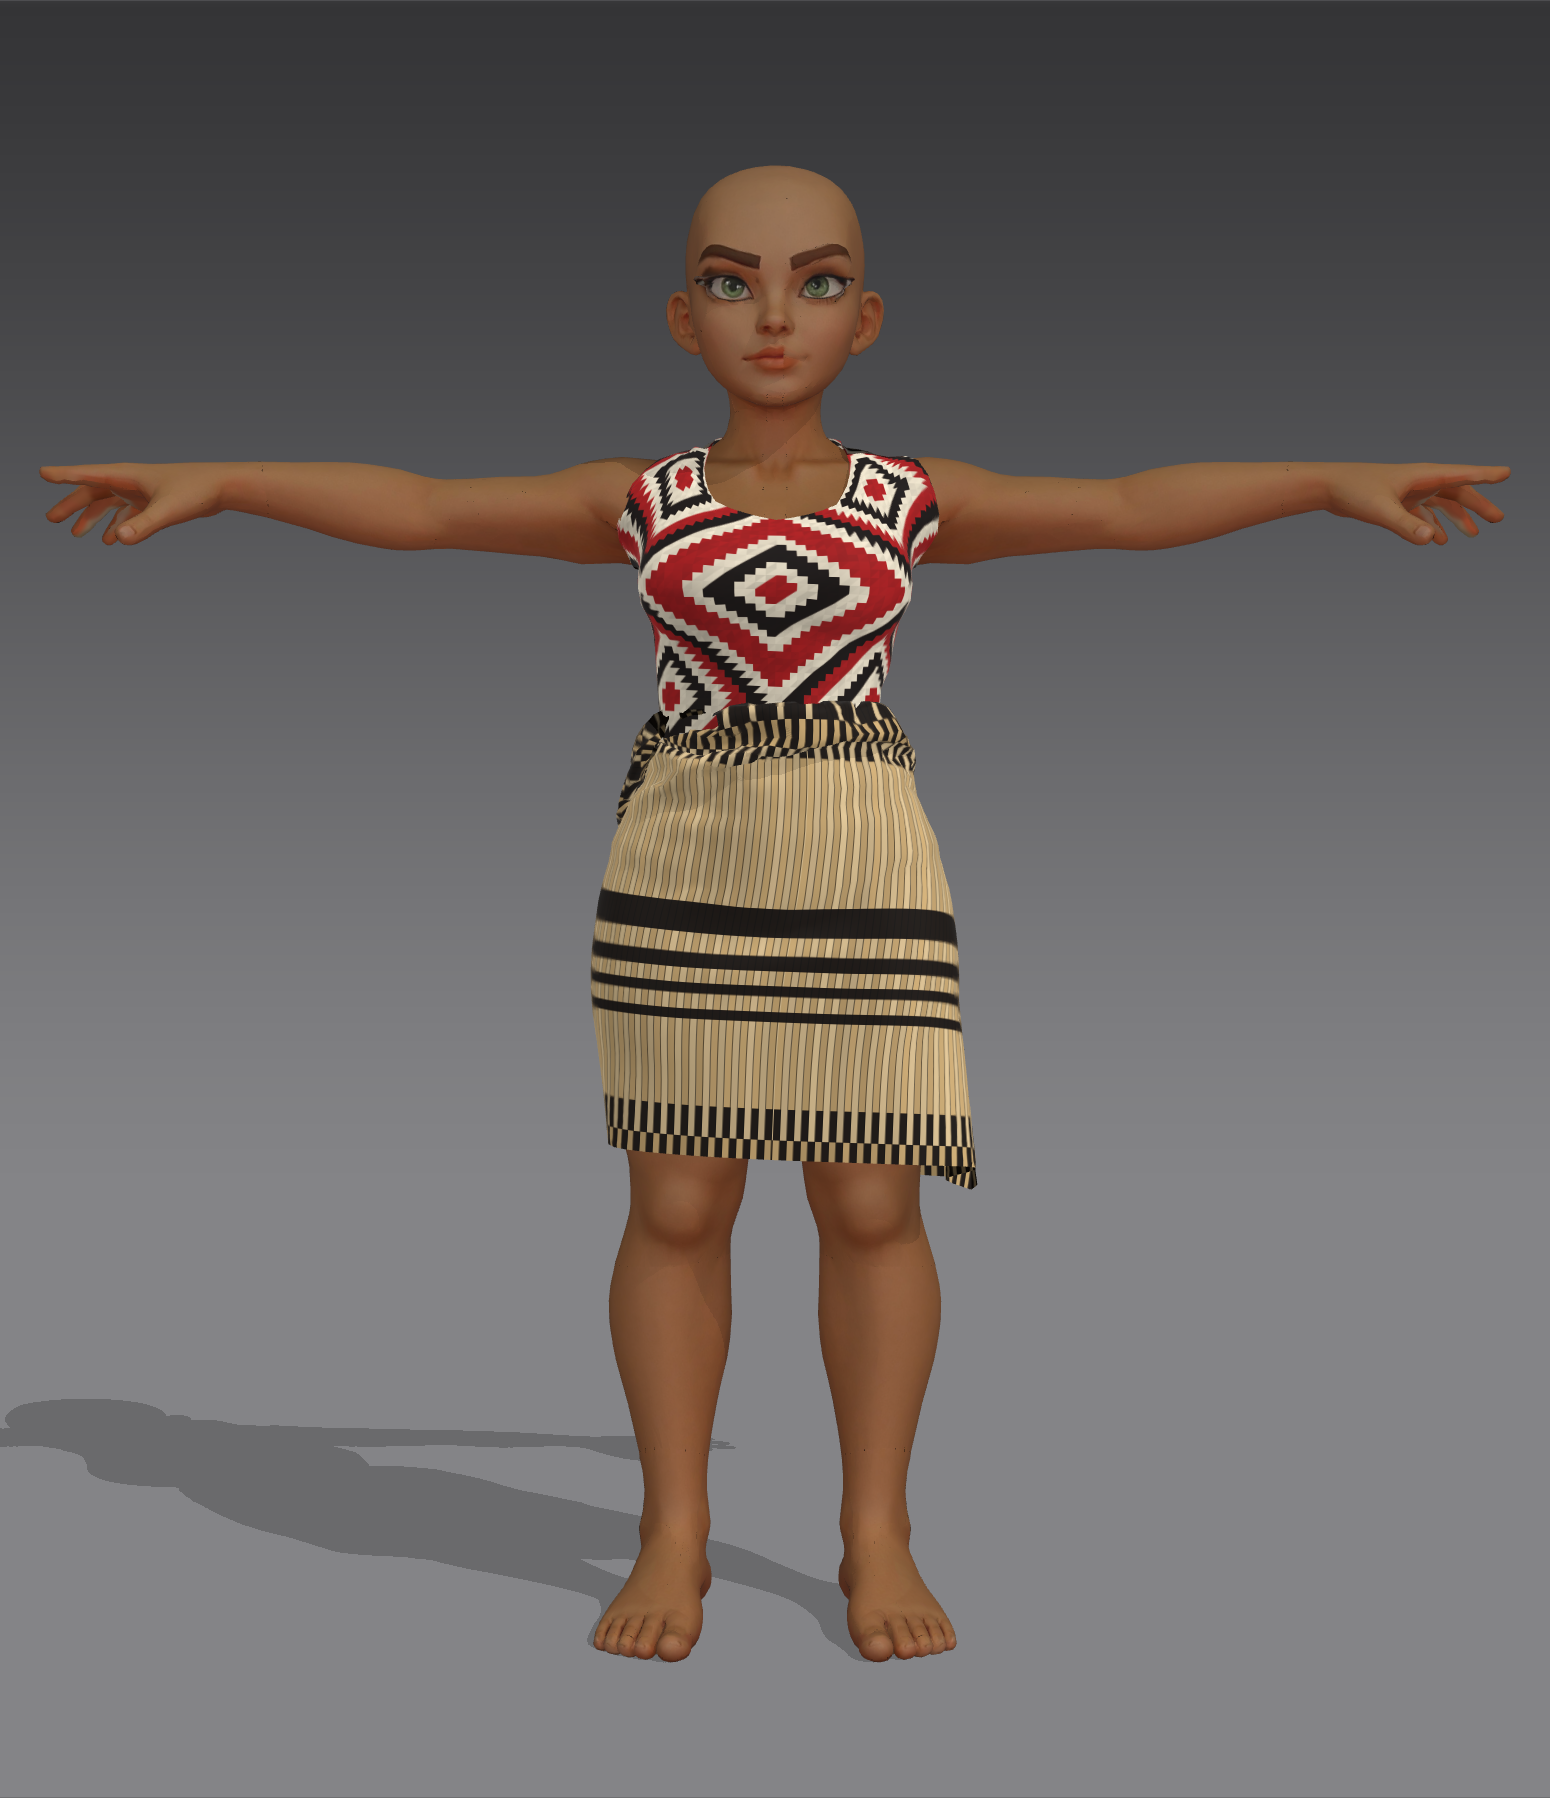
from the reference photo. For the kapa haka outfit that table was: pari top at
1.31 m ±3 cm (above the bust), pari hem and piupiu waist at
1.05 m ±3 cm, piupiu hem at 0.45 m ±4 cm
(below the knee). We iterate until it's inside tolerance.
Every shipped garment also gets a screenshot committed to
tools/tailor/screenshots/, front and back. That's how the work gets reviewed
without anyone opening Marvelous Designer.
| File | Why we keep it |
|---|---|
.zprj | The editable source of truth. Opens in MD normally. Regenerating a variant from this always beats re-authoring. |
.fbx | What the downstream Blender pipeline consumes. |
.obj | Plain-text backup, and the only reliable way to measure the mesh (see below). |
.zpac | For assembling multi-piece outfits later. |
Marvelous Designer has an embedded Python API. We wrote a small plugin that opens a socket inside
MD (TinqsMDBridge), so a script on the outside can send it commands — create these
panels, sew this edge to that one, simulate 250 frames, render the viewport to a PNG.
The whole method is a vision loop: draft, drape, render, look at the image, measure it, adjust, repeat. That's what makes it possible to iterate a garment dozens of times in an afternoon.
Two things to know if you're sitting at the machine. MD's embedded Python
can't run in the background, so the bridge takes over the main thread: a human has to
click Plugin → TinqsMDBridge to start a session, and MD's window freezes for
the whole session — "Not Responding" is normal, not a crash. Ending the session with
python tools/md_bridge.py --stop gives the UI straight back. If you want to look at
the model yourself, we stop the session first.
None of this locks the work up. The .zprj files are ordinary MD projects — open them,
edit patterns, re-drape, re-export by hand any time. The bridge is just how the automation drives
the same buttons.
Authored on and after 2026-07-30. Vertex counts are the exported garment mesh.
| Garment | What it is | Versions | Verts |
|---|---|---|---|
| Tee | First test — fitted top block | v1 | 2,335 |
| Skirt | First test — A-line block, the most forgiving garment | v1 | 1,988 |
| Pari | Kapa haka bodice, tāniko pattern | v1 → v4 | 1,406 |
| Piupiu | Kapa haka flax skirt, strand block | v1 → v3 | 3,022 |
| Cape | Shoulder garment | v1, v2 | 4,664 |
| Kapa haka outfit | Pari + piupiu assembled together | v1 → v3 | — |
Our own garments are far cheaper than downloaded ones. These export at 1.2k–4.7k verts. The downloaded MD dress the clothing pipeline was first piloted on was 2.49 million verts / 110 MB. So the brutal reduce stage downstream is mostly unnecessary for our work — and because they were draped on the real game body, they arrive already fitted.
For traditional wear, garment identity lives in the pattern, not the cut. Kapa
haka, Mexica and Pacific garments are largely rectangles and simple blocks. So we model the shape
simply and spend the effort on the cloth: taniko.png (concentric woven diamonds) and
piupiu.png (flax strands with geometric banding) are both generated procedurally from
reference photos, and both are reusable.
One non-obvious control: in MD, a PNG's DPI sets its physical size on the cloth. 1024 px at 54.2 dpi is 480 mm of fabric. You tile a motif by changing the DPI, not by scaling the image.
| What happens | Why |
|---|---|
| The garment drapes upside-down over her head and tangles | In MD's 2D pattern window, y+ is UP in 3D. Panels drafted y-down come out inverted. It looks exactly like a seam bug and isn't — seven iterations were lost to this once. |
| A strapless top slides down to the underbust | Cloth falls to the narrowest catch. MD doesn't simulate putting a garment on — it materialises the cloth where you arranged it. Add straps; it fixes placement and coverage at once. |
| The garment slides off the shoulders or twists partly inside out | Seam pairing. Panels drafted as identical copies offset sideways are not mirrored, and need the opposite flip setting from mirrored ones. |
| Everything in the scene changes colour at once | Fabric slot 0 is the shared default. Colouring it dyes every garment. Always add a new fabric. |
| A defect ships because nobody saw the back | MD's snapshot camera has no rear view at all — bottom, front, ¾, sides, top, and that's it. Four separate defects shipped through this blind spot before we started using turntable renders for the back. |
| A busy texture hides folds and inside-out panels | Judge shape with the texture off: cloth renders white on its front face and grey on its back, so a grey patch seen from outside is inside out and a white streak is a fold. |
The one diagnostic that unsticks everything: render the scene right after arranging the panels but with zero simulation frames. That shows where the cloth actually starts, before physics muddies the picture. Reach for it the moment a drape misbehaves.
| Path | What's there |
|---|---|
tools/tailor/ | The garment workshop: per-garment recipes, the parametric blocks, Lena's measurement card, QC scripts, generated textures, and every shipped .zprj/.fbx/.obj |
tools/tailor/screenshots/ | The review renders — start here to see what exists |
tools/md_bridge.py + tools/md_bridge/ | The socket bridge into MD, and a dump of MD's real API surface (688 functions, introspected — the published docs are thin and several signatures in them are wrong) |
clothing/ | The downstream half: garment mesh → game-ready skinned GLB |
.claude/skills/marvelous-designer/ | The full operating playbook, written for whoever (or whatever) is driving |
.agents/wiki/architecture/clothing-lane.md | How the two halves fit together |